Inspiration & Advice
How to build a garden path
(and boundary) like a pro!
How to build a garden path (and boundary) like a pro!
Paths aren't only a practical outdoor solution for navigating your garden. They also add character and tempt you to explore hidden nooks and crannies. And anyone can build an outdoor walkway with a little guidance from Jack!
Whether it’s taking you to your front door or shed, acting as an island between garden beds, or leading you across the lawn, you only need a few products and materials to build a good-looking path that will tread well for years.
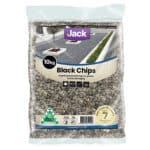
We’ve chosen our Jack Oxy-Shield Edging and Landscaping Chips to create an earthy, natural-looking path. But you could definitely mix it up depending on your aesthetic. We’ve even gone all out and added a neat little boundary edge.
Ready to path like a pro? Walk this way, and let’s get started!
What you'll need
Before you prepare your path, make sure you check off everything on the list. There’s a table to help you work out rock quantities under Step 6.

Suggested Jack products


Additional tools & materials
Optional extra: Hire a compactor machine or tamping tool for path surfacing.
- Tape measure, Spirit level, pencil
- Hammer
- Square measure
- Flat head screwdriver
- Garden shovel
- Timber block
Your step-by-step guide
Mark & measure


Decide where you want your path and mark and measure the boundary using a tape measure.

 Don't forget to measure the curves and corners if your path isn't straight!
Dig out the dirt


Once you’ve done that, grab your spade and start digging out the area. Go about 150mm deep to allow for a sub-base and decorative top lay.
Let's get edging!

 A heavy wood block makes the perfect buffer when hammering down.

Jack Oxy-Shield Edging is ideal to use directly on soil surfaces. Simply push into place, and bend into a curve if needed. Next, place your timber block on top and bang firmly with a hammer. Check your levels as you go.


To join the edging panels, align them together, then use a screwdriver to bend the locking tabs into place.

 • To create a corner edge, place the edge panel on the ground, put timber on top and bend up to make a right angle. Use another block on the outside of the bend and hammer firmly.
Backfill the edge


Now grab the garden shovel and start scooping dirt around the outside of your edging. This will help keep it in place. And that’s your edging done!
Fill & compact


Next, shovel in a solid sub-base. This acts as a foundation for the decorative layer. Then water and compact to ensure it settles into place.
Add landscaping rocks


To make your path look pretty, add your decorative chips on top of the sub-base. Use your hands to spread and smooth them out.

 Take a look at our handy calculator above to work out the quantity of landscaping chips you'll need.

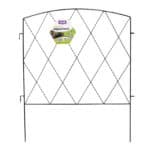
And, ta-dah, that’s your pathway done! To add something extra, grab some Jack Diamond Edging to create simple boundaries. It’s easy. Panels simply push in and lock together. Great job!

